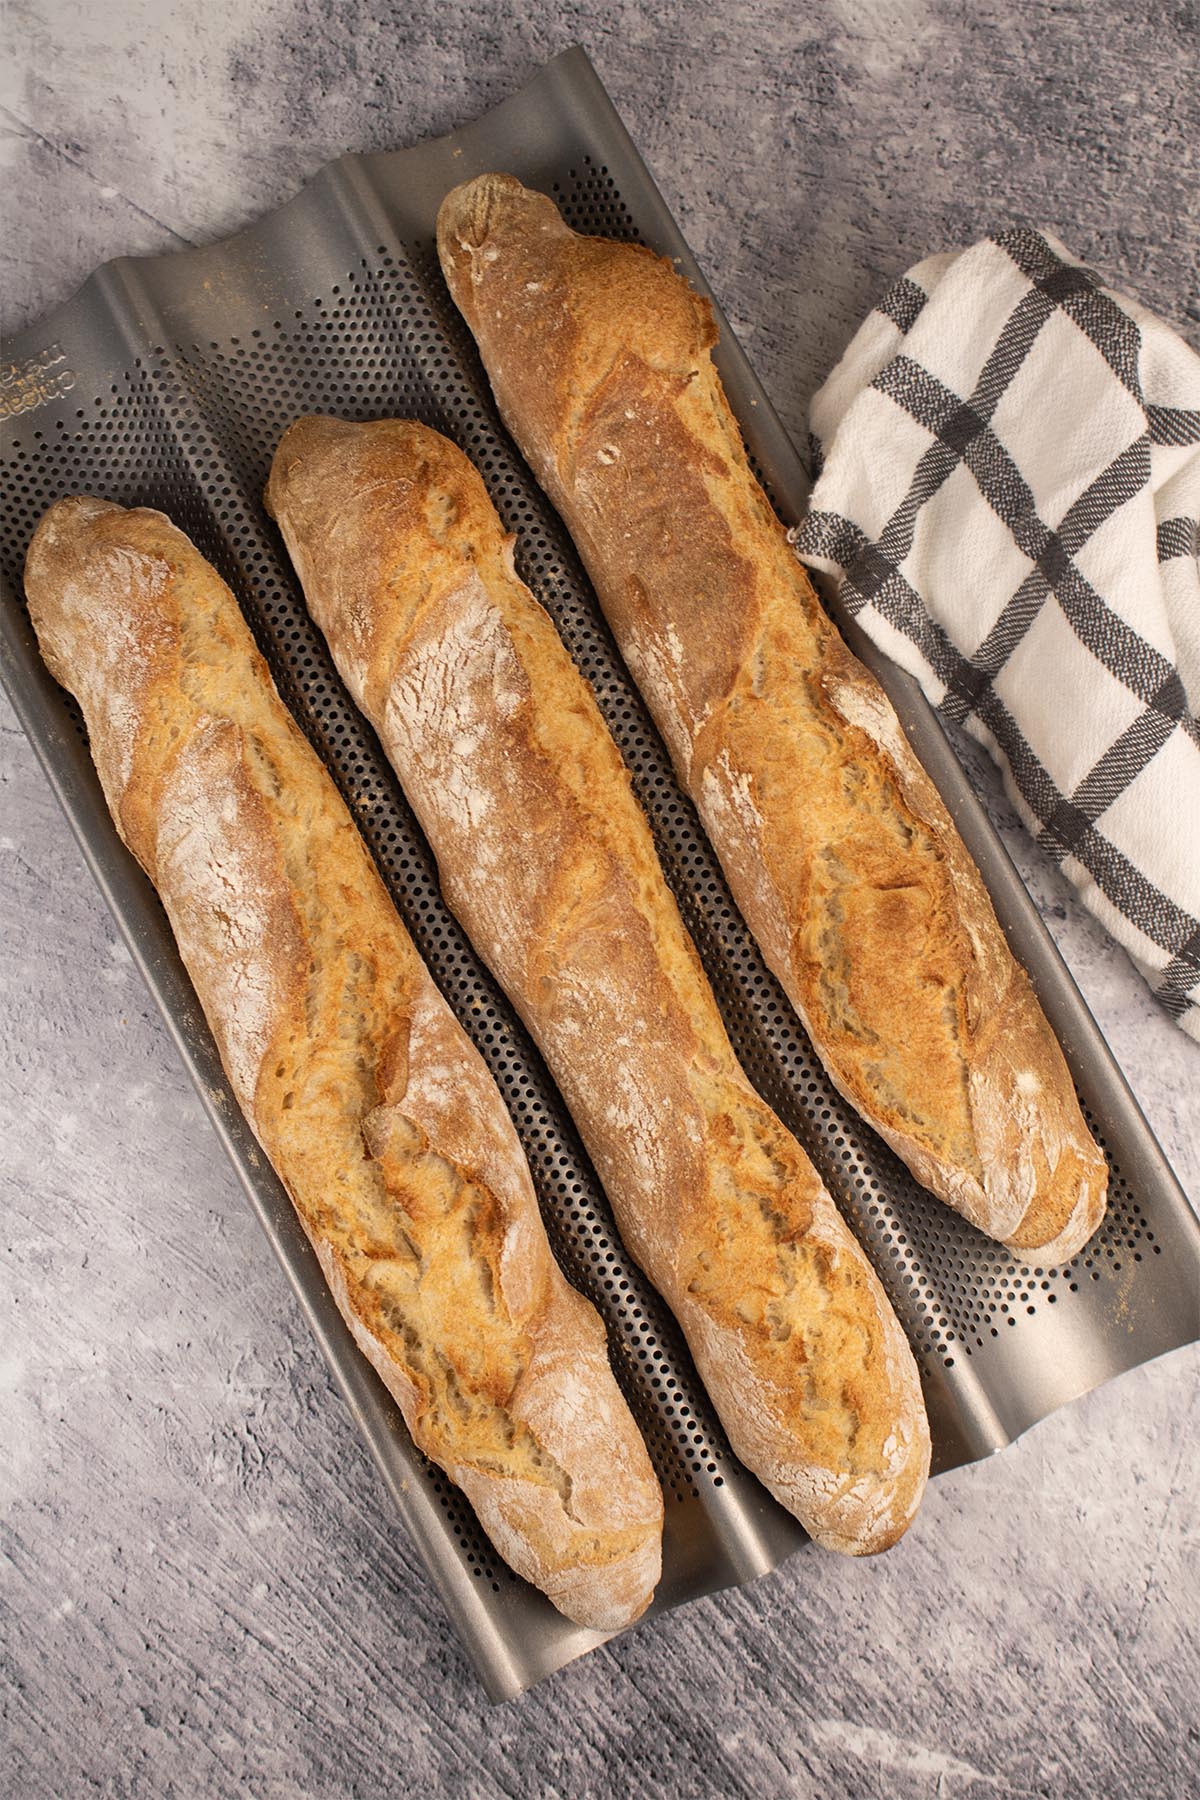
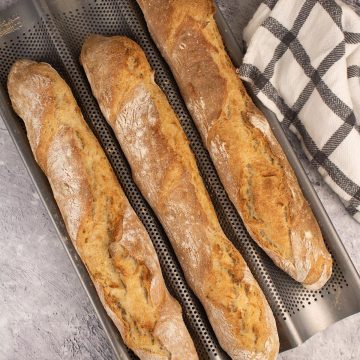
These baguettes that David has made many times in our Thermomix have got to be one of my favourites. We're both total bread lovers and could demolish the 3 baguettes in no time at all!! They're great on their own, as a sandwich or as a side to soup, pasta and rice dishes.
Please read our Tips and the Cookidoo Tips below. They are really helpful...especially if you're not confident or are a novice bread maker (like me!). I decided to try making a batch of the baguettes recently and definitely found these helpful...especially the one to watch for them browning too much. I did turn the temperature down...just not quick enough. They did end up a bit on the brown side and quite crispy at the ends...but they were still tasty!!
If you don't have a Thermomix and would like to try making this recipe, please scroll down for the Non-Thermomix Instructions I have suggested.
Tips
- Take note of the instruction at step 6 to reduce the temperature, if the baguettes are becoming too brown. We'd suggest baking for 10 minutes at the higher temperature and then reducing it for the remaining 10 minutes.
- After making these baguettes a few times, baking them on baking paper on a heated baking tray as per the instructions, we did a search on Amazon for a baguette baking tray...and such a thing does exist! At step 4, the rolled out baguettes go directly on to the tray (it doesn't need to be preheated), covered with oiled cling film or a damp tea towel and left to prove for 45 minutes. The tray with the baguettes on it then goes into the oven for baking as per step 6.
Cookidoo Tips
- To test if the baguettes are ready to bake, gently press the dough with your fingertip. The indentation left by your finger should slowly disappear. If the dough springs up quickly then it has not risen sufficiently. If the indentation remains, the dough has over-proved. The baguettes won’t rise as much in the oven but they will still taste good.
- Creating the burst of steam at the beginning of baking gives the baguettes their crisp, golden crust. Be very careful not to splash yourself or any glass elements in your oven. You may omit the steam if desired.
- Baguettes develop more flavour if you chill the dough overnight in the fridge. After the dough has risen in step 2, gently fold dough over itself to deflate it, cover the bowl with cling film and store in the fridge. The next day, proceed with step 3 as directed in the recipe. The baguettes may need 10 to 20 minutes longer to rise in step 4 before baking.
Other recipes you might also like to try
Click here for all bread recipes.
Recent New Recipes


Category Spotlight...
GREEK RECIPES
We love Greek flavours of feta, oregano, lemon and olive oil...you'll find some delicious recipes here!
Recipe on UK Cookidoo
If you don't have the Cookidoo app for your Thermomix, follow the recipe below:
Ingredients
- 330g water, plus 100g very hot water for baking
- 1 tsp dried instant yeast
- oil, for greasing
- 500g bread flour, plus extra for dusting
- 1.5 tsp fine sea salt
Instructions
Make and shape the dough:
- Place the water and yeast in the mixing bowl then warm 2 minutes/37C/speed 2. Meanwhile, lightly grease a large bowl.
- Add the flour and salt then knead 2 minutes. Transfer the dough to the prepared bowl, cover with cling film or a damp tea towel and leave to rest until doubled in size (approx. 1.5 hours).
- On a lightly floured surface, use a large knife to separate the dough into 3 equal-sized pieces. Gently flatten and roll each piece loosely into a log shape and set aside on a lightly floured surface. Dust the rolls lightly with flour, cover with cling film or a damp tea towel and leave to rest for 20 minutes.
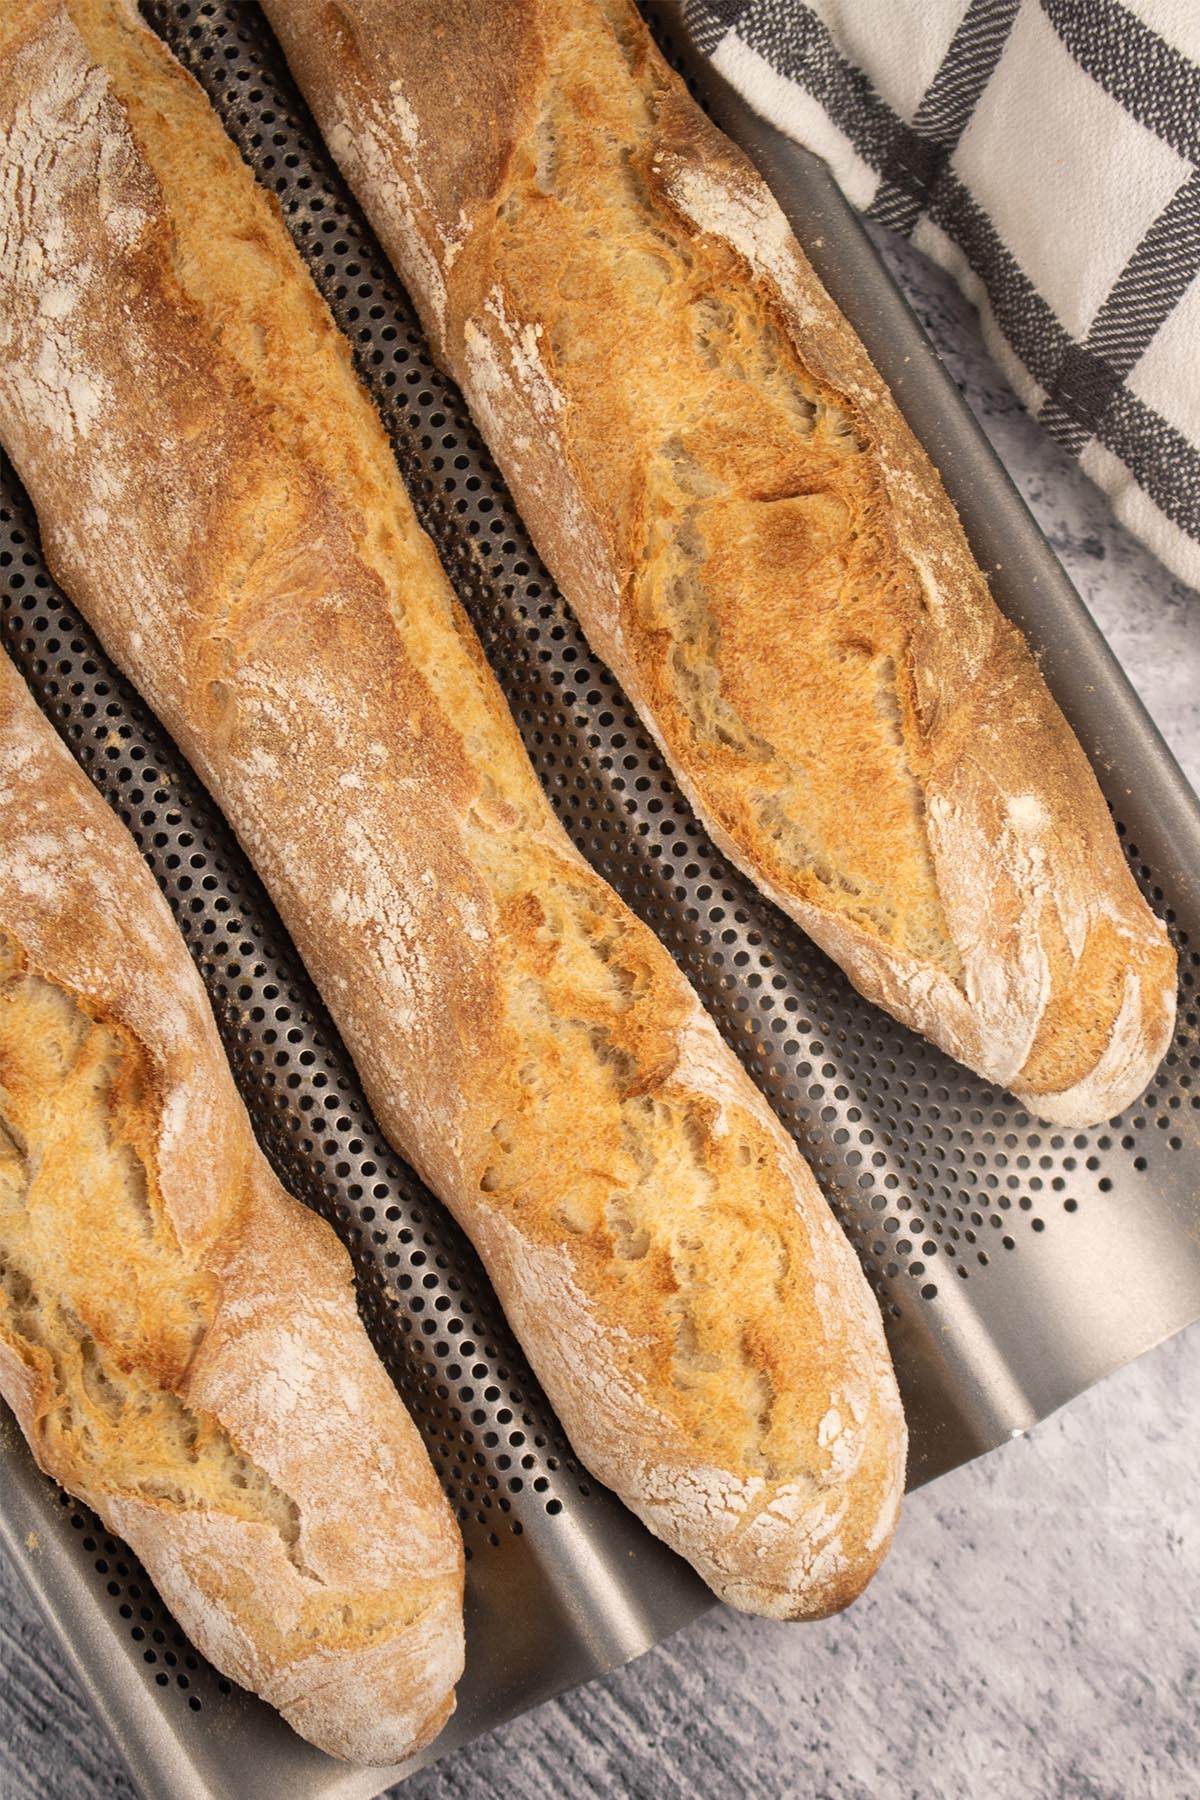
- Gently flatten each piece of dough again into a rectangle, taking care to preserve air bubbles trapped within. Roll the dough again into a log shape. Pinch seam of each roll with fingers to seal. Elongate each roll into a baguette shape, rolling back and forth exerting gentle pressure from the middle of the baguette to its ends. Place the baguettes, seam side down, on baking paper, pulling up the paper between the baguettes to create a low divider. This will help the baguettes to hold their shape and prevent them from sticking to each other as they rise. Cover the baguettes loosely with cling film or a damp tea towel and leave to prove for a further 45 minutes.
Bake:
- Towards the end of rising time, place 2 baking trays (approx. 40cm x 35cm) in the lower part of the oven, one tray on the lowest shelf, the other on the shelf above. Preheat oven to 250C.
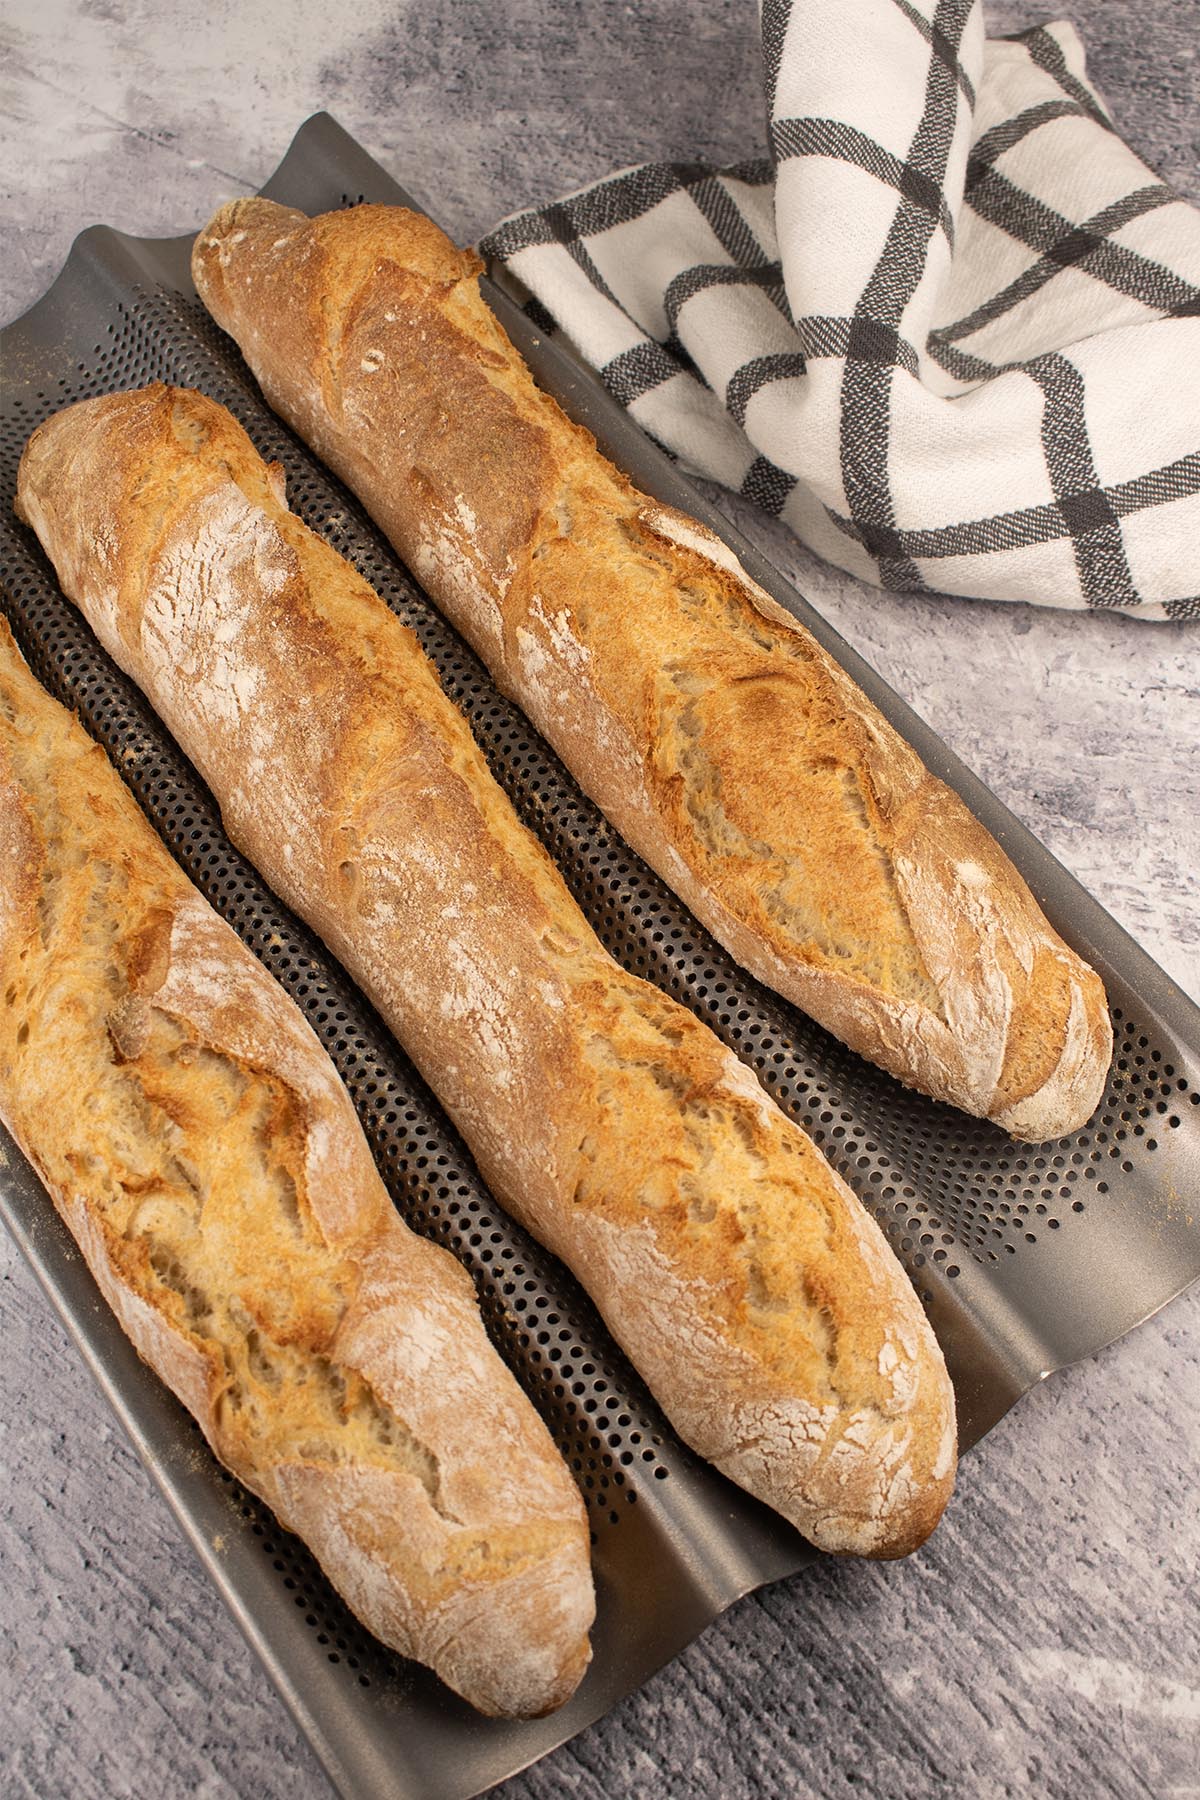
- Prepare approx. 100g very hot water in a cup. Slash the baguettes with a very sharp knife, making three overlapping slashes along the length of each. Slide the baguettes, together with baking paper, onto the top of the preheated tray. Quickly but carefully splash the hot water onto the lower baking tray to create steam (see Cookidoo Tips) and immediately close the oven door to trap the steam. Bake for 20 minutes (250C) or until dark golden brown. If the baguettes seem quite brown before the end of the baking time, reduce the oven temperature to 230C. Leave to cool for 20 minutes before slicing.
Non-Thermomix Instructions
I'd suggest the recipe can easily be adapted using a jug and large bowl or stand (food) mixer. My suggestions are as follows:
Make and shape the dough:
- Place the water and yeast in a jug – note: the water needs to be lukewarm (around 37C) – stir to mix then leave to stand for 2 minutes. Meanwhile, lightly grease a large bowl.
- If using a stand (food) mixer, pour in the yeast mixture and then add the flour and salt then knead for 2 minutes. If kneading by hand, knead for 10 minutes. Transfer the dough to the prepared bowl, cover with cling film or a damp tea towel and leave to rest until doubled in size (approx. 1.5 hours).
- On a lightly floured surface, use a large knife to separate the dough into 3 equal-sized pieces. Gently flatten and roll each piece loosely into a log shape and set aside on a lightly floured surface. Dust the rolls lightly with flour, cover with cling film or a damp tea towel and leave to rest for 20 minutes.
- Gently flatten each piece of dough again into a rectangle, taking care to preserve air bubbles trapped within. Roll the dough again into a log shape. Pinch seam of each roll with fingers to seal. Elongate each roll into a baguette shape, rolling back and forth exerting gentle pressure from the middle of the baguette to its ends. Place the baguettes, seam side down, on baking paper, pulling up the paper between the baguettes to create a low divider. This will help the baguettes to hold their shape and prevent them from sticking to each other as they rise. Cover the baguettes loosely with cling film or a damp tea towel and leave to prove for a further 45 minutes.
Bake:
- Towards the end of rising time, place 2 baking trays (approx. 40cm x 35cm) in the lower part of the oven, one tray on the lowest shelf, the other on the shelf above. Preheat oven to 250C.
- Prepare approx. 100g very hot water in a cup. Slash the baguettes with a very sharp knife, making three overlapping slashes along the length of each. Slide the baguettes, together with baking paper, onto the top of the preheated tray. Quickly but carefully splash the hot water onto the lower baking tray to create steam (see Cookidoo Tips) and immediately close the oven door to trap the steam. Bake for 20 minutes (250C) or until dark golden brown. If the baguettes seem quite brown before the end of the baking time, reduce the oven temperature to 230C. Leave to cool for 20 minutes before slicing.
Alternative Suggestion
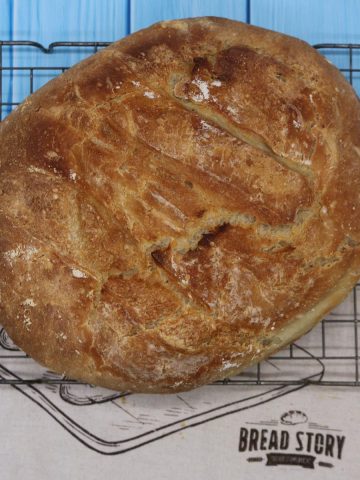
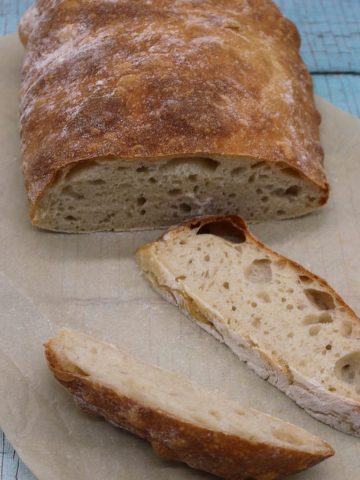
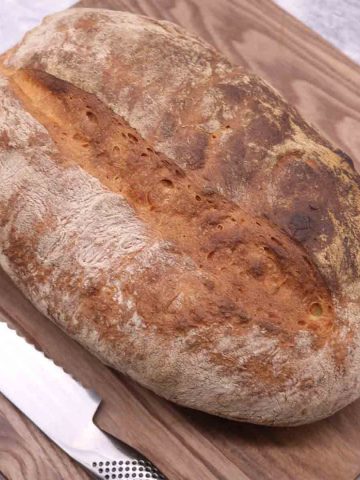
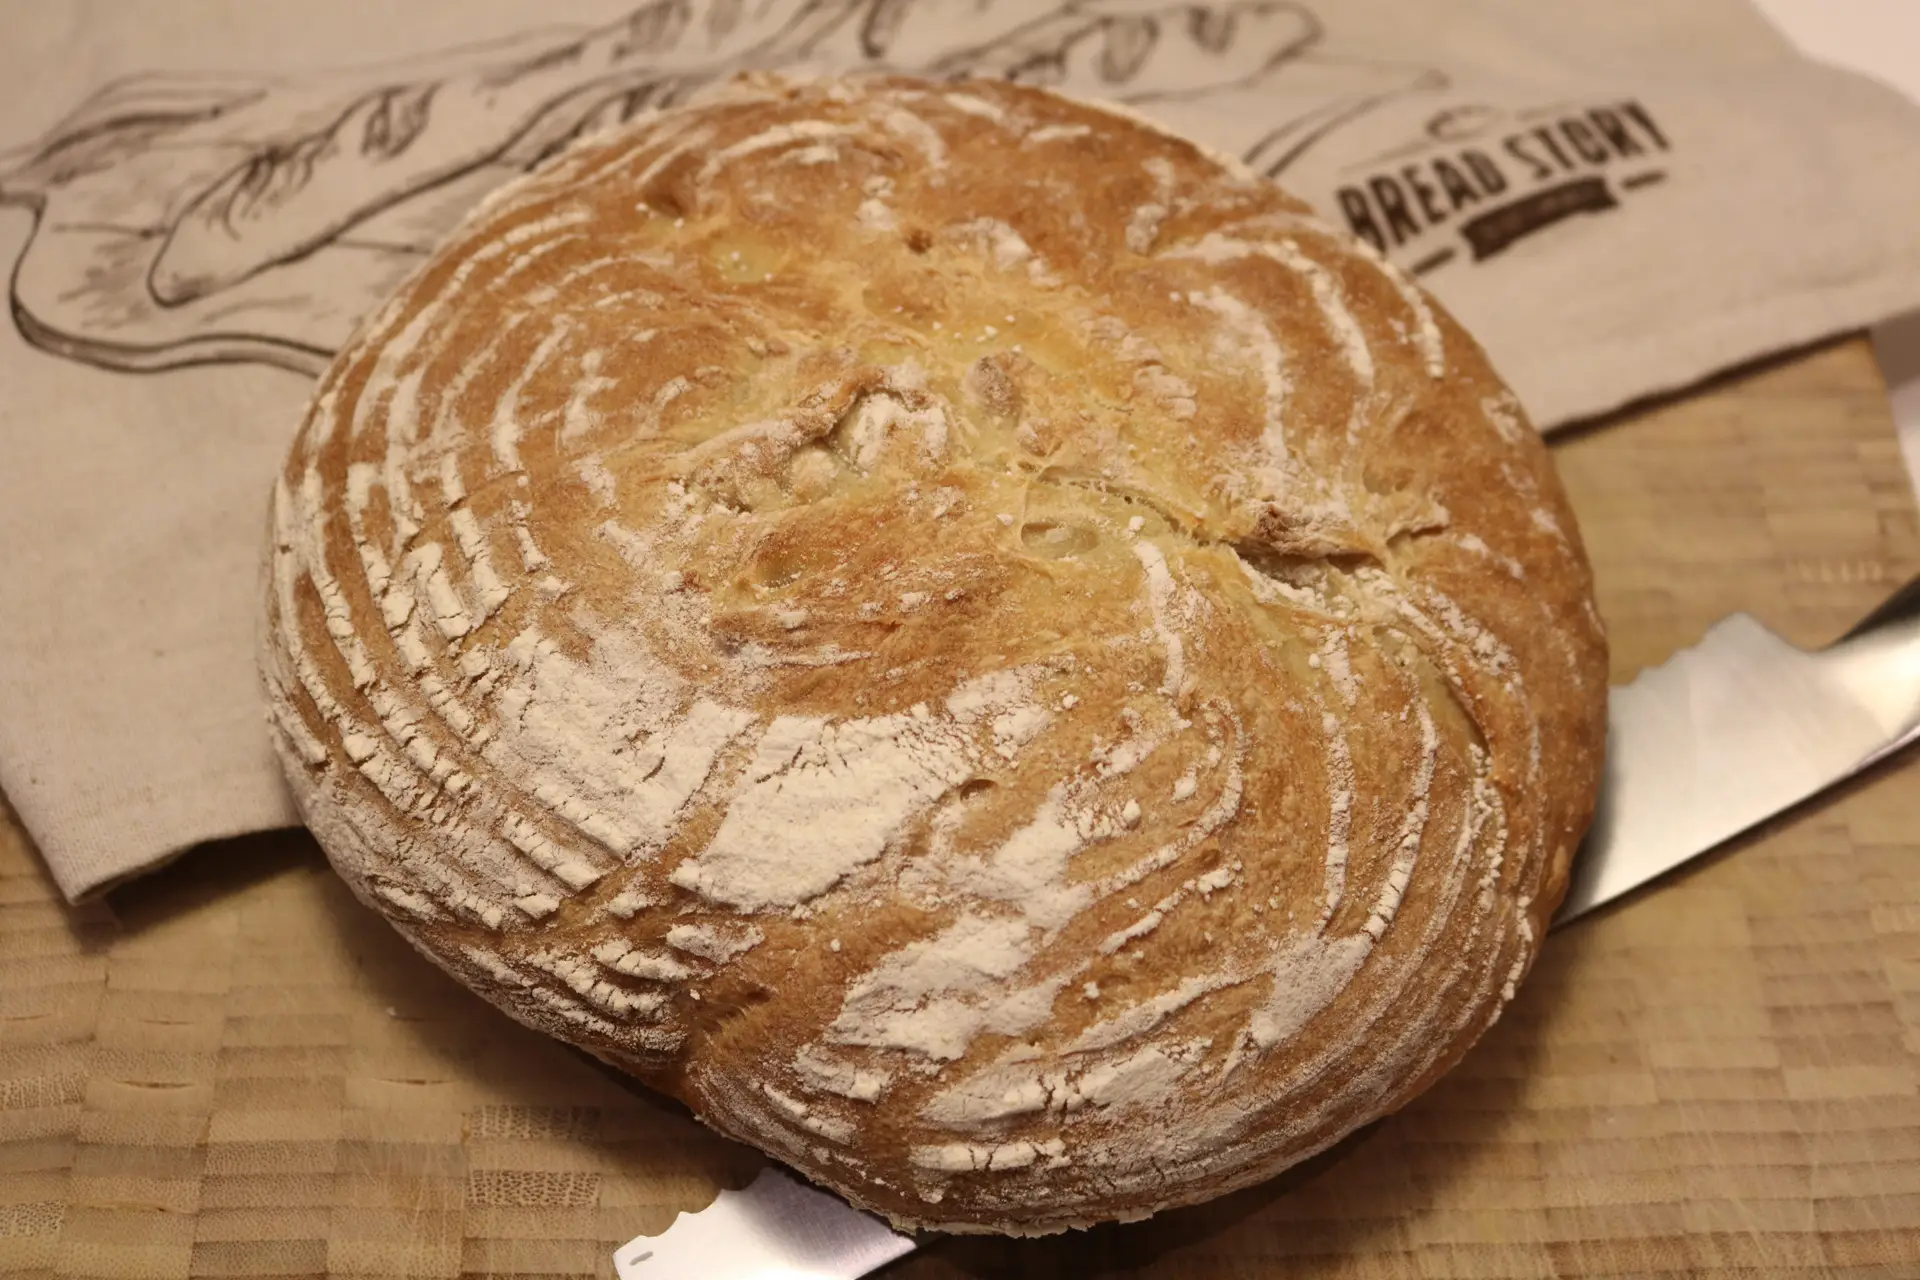
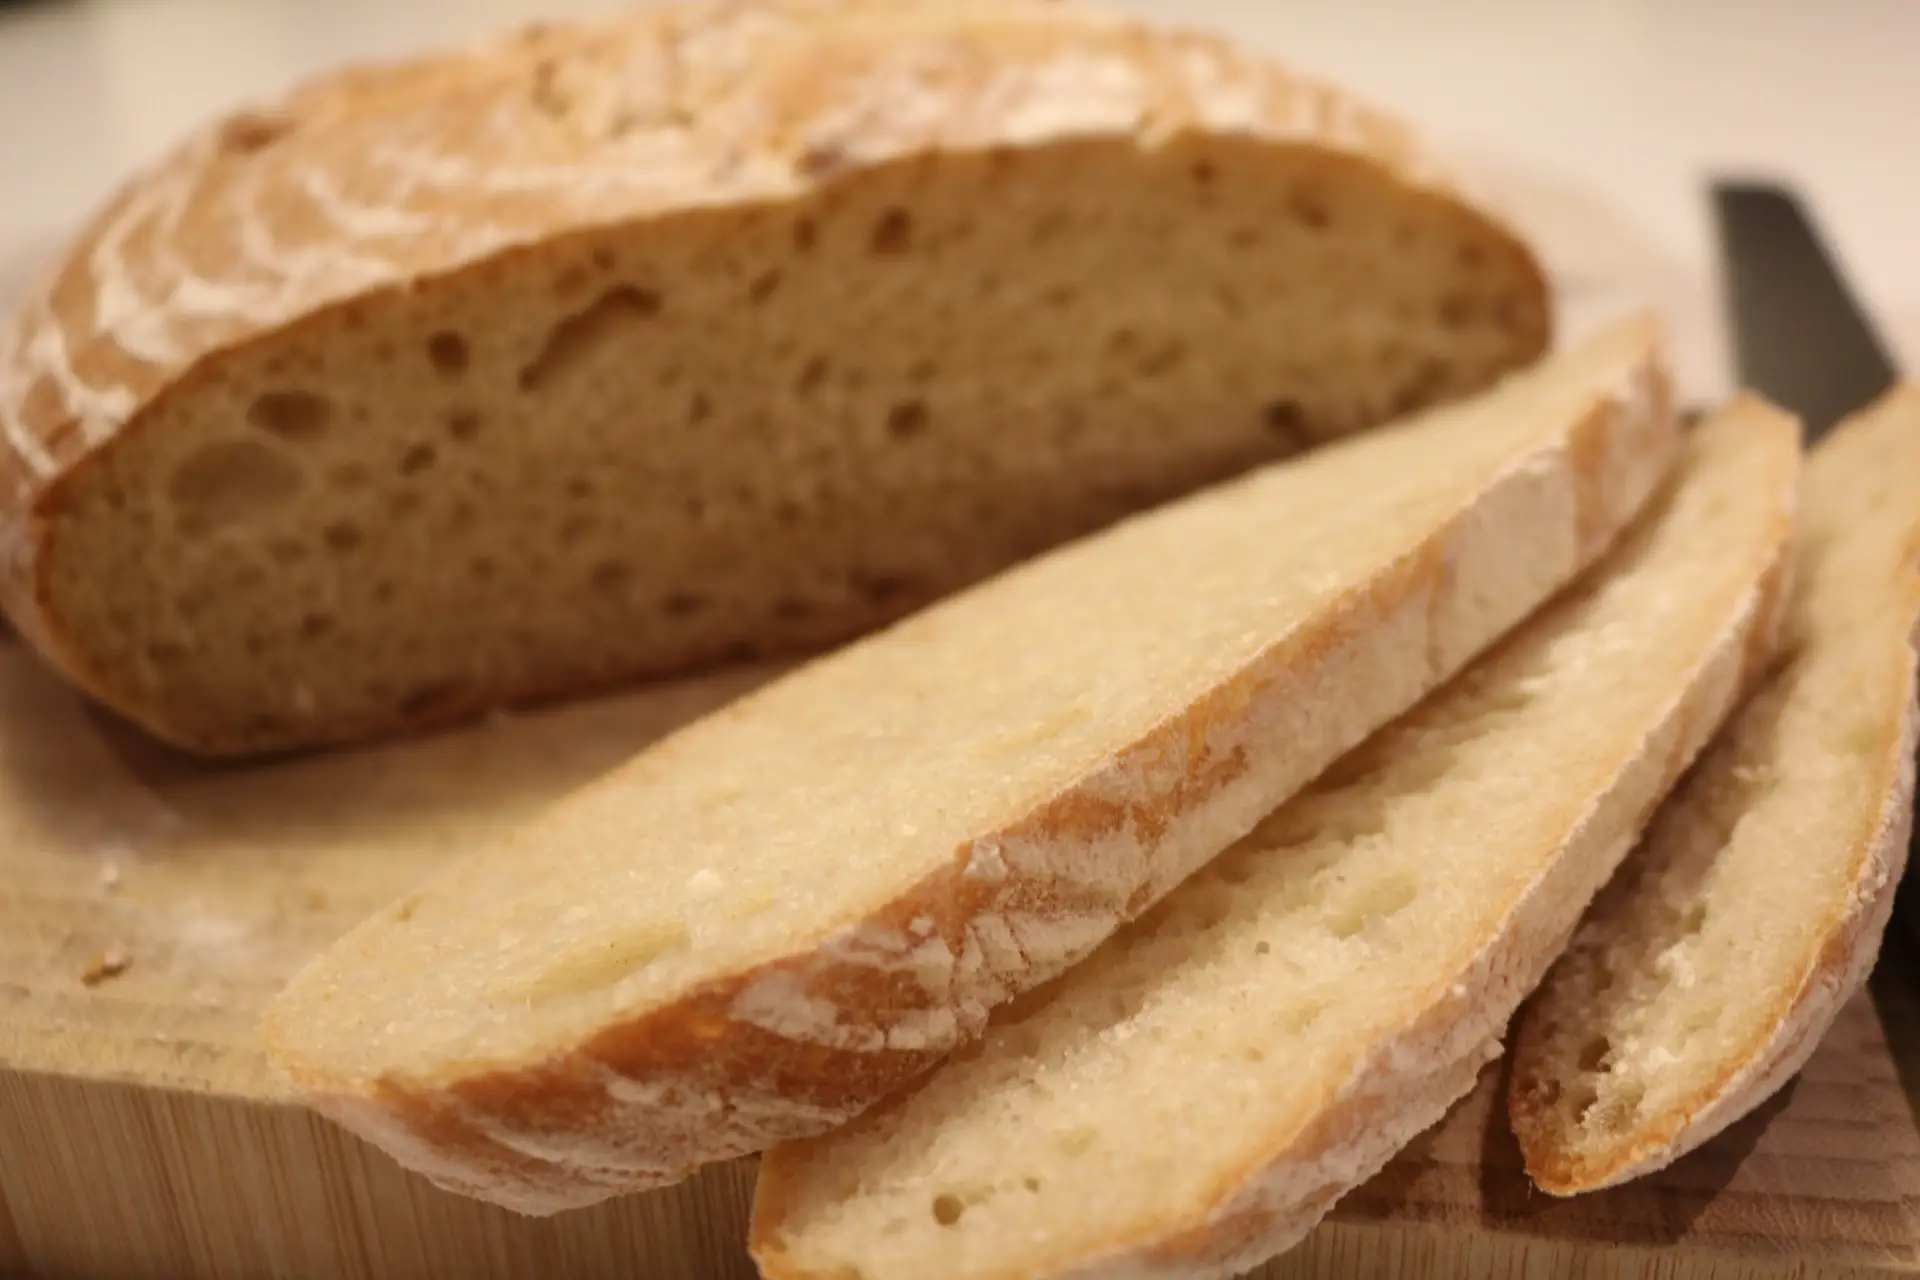
- David experimented recently and instead of dividing the dough to make 3 baguettes, he used the dough to make a round loaf instead...it was delicious and will definitely be made again - see the photos below.
- at step 3, transfer the proved dough out of the bowl and onto a lightly floured surface. Lightly flour the turned out dough as well and then liberally flour a proofing basket. Carefully transfer the lightly floured dough into the proofing basket - the side of the dough facing up at you should be the side that goes face down into the basket. Cover and prove for one hour.
- at step 5, only one baking tray (for the hot water) needs to go into the oven to preheat at a lower temperature of 210C. You'll need the tray that you're baking the bread on to be cold so that you can turn it out of the proofing basket onto it.
- at step 6, turn the dough out of the proofing basket onto a cold baking tray - it should turn out easily enough! Bake for 20 to 25 minutes.

Recipe Collection Spotlight...
6 TASTY TACO RECIPES TO TICKLE YOUR TASTEBUDS!
We LOVE Mexican food...there's quite a few delicious recipes on Felly Bull, so I've picked out 6 tasty taco recipes to tickle your tastebuds!
Did you make this recipe?
I’d love to hear how it went…both good and bad!
Please go to the bottom of the page to rate the recipe and/or leave your comments.
It would also be great if you could take a photo and tag Felly Bull on social media, thanks.
Subscribe to receive our new and highlighted recipes in your email inbox each week...plus receive our new e-Cookbook for free!!!
Baguettes (Thermomix)
Ingredients
If you don't have the Cookidoo app for your Thermomix follow the recipe below:
- 330g water plus 100g very hot water for baking
- 1 tsp dried instant yeast
- oil for greasing
- 500g bread flour plus extra for dusting
- 1.5 tsp fine sea salt
Instructions
Make and shape the dough:
- Place the water and yeast in the mixing bowl then warm 2 minutes/37C/speed 2. Meanwhile, lightly grease a large bowl.
- Add the flour and salt then knead 2 minutes. Transfer the dough to the prepared bowl, cover with cling film or a damp tea towel and leave to rest until doubled in size (approx. 1.5 hours).
- On a lightly floured surface, use a large knife to separate the dough into 3 equal-sized pieces. Gently flatten and roll each piece loosely into a log shape and set aside on a lightly floured surface. Dust the rolls lightly with flour, cover with cling film or a damp tea towel and leave to rest for 20 minutes.
- Gently flatten each piece of dough again into a rectangle, taking care to preserve air bubbles trapped within. Roll the dough again into a log shape. Pinch seam of each roll with fingers to seal. Elongate each roll into a baguette shape, rolling back and forth exerting gentle pressure from the middle of the baguette to its ends. Place the baguettes, seam side down, on baking paper, pulling up the paper between the baguettes to create a low divider. This will help the baguettes to hold their shape and prevent them from sticking to each other as they rise. Cover the baguettes loosely with cling film or a damp tea towel and leave to prove for a further 45 minutes.
Bake:
- Towards the end of rising time, place 2 baking trays (approx. 40cm x 35cm) in the lower part of the oven, one tray on the lowest shelf, the other on the shelf above. Preheat oven to 250C.
- Prepare approx. 100g very hot water in a cup. Slash the baguettes with a very sharp knife, making three overlapping slashes along the length of each. Slide the baguettes, together with baking paper, onto the top of the preheated tray. Quickly but carefully splash the hot water onto the lower baking tray to create steam (see Cookidoo Tips) and immediately close the oven door to trap the steam. Bake for 20 minutes (250C) or until dark golden brown. If the baguettes seem quite brown before the end of the baking time, reduce the oven temperature to 230C. Leave to cool for 20 minutes before slicing.
Notes
- Take note of the instruction at step 6 to reduce the temperature, if the baguettes are becoming too brown. We'd suggest baking for 10 minutes at the higher temperature and then reducing it for the remaining 10 minutes.
- After making these baguettes a few times, baking them on baking paper on a heated baking tray as per the instructions, we did a search on Amazon for a baguette baking tray...and such a thing does exist! At step 4, the rolled out baguettes go directly on to the tray (it doesn't need to be preheated), covered with oiled cling film or a damp tea towel and left to prove for 45 minutes. The tray with the baguettes on it then goes into the oven for baking as per step 6.
- To test if the baguettes are ready to bake, gently press the dough with your fingertip. The indentation left by your finger should slowly disappear. If the dough springs up quickly then it has not risen sufficiently. If the indentation remains, the dough has over-proved. The baguettes won’t rise as much in the oven but they will still taste good.
- Creating the burst of steam at the beginning of baking gives the baguettes their crisp, golden crust. Be very careful not to splash yourself or any glass elements in your oven. You may omit the steam if desired.
- Baguettes develop more flavour if you chill the dough overnight in the fridge. After the dough has risen in step 2, gently fold dough over itself to deflate it, cover the bowl with cling film and store in the fridge. The next day, proceed with step 3 as directed in the recipe. The baguettes may need 10 to 20 minutes longer to rise in step 4 before baking.


LEAVE A COMMENT AND RATE THIS RECIPE